Turning Your Computer into a Network Server: A Guide
Repurposing a computer into a server offers a cost-effective solution for personal or business needs. Instead of investing in expensive enterprise-grade equipment, existing hardware can be transformed into a powerful tool for various applications.
By setting up a network server, you can host websites, share files, or automate home systems. This approach saves money and maximizes the utility of older devices. Operating systems like Linux or Windows provide flexible options for customization.
Whether for web hosting, media streaming, or data backup, a repurposed computer can handle diverse tasks. This guide will walk you through the essential steps to configure your system efficiently.
Understanding Network Servers and Their Uses
Servers play a vital role in modern networks, offering centralized resources for businesses and individuals. They manage data, applications, and services efficiently, ensuring smooth operations. Whether for hosting websites or sharing files, servers are indispensable in today’s digital landscape.
What Is a Server and Why Do You Need One?
A server is a powerful machine designed to handle requests from multiple clients. In an office setup, for example, employees’ computers (clients) access shared files or applications hosted on a central server. This client-server architecture ensures efficient resource distribution and management.
Related Posts:


Servers are essential for businesses of all sizes. They provide critical services like email hosting, document storage, and data backups. With 43% of cyberattacks targeting SMBs, investing in a secure server setup is more important than ever.
Types of Servers for Home and Business Use
There are several types of servers, each serving specific functions. File servers manage storage and sharing, while web servers host websites and applications. Email servers handle communication, and database servers store structured data.
Proxy servers add an extra layer of security by masking network IP addresses and filtering traffic. They act as intermediaries, reducing the risk of cyberattacks. For businesses, choosing between cloud and on-premise servers depends on needs like scalability, control, and compliance.
As businesses grow, their IT infrastructure must evolve. A robust server setup improves efficiency, reliability, and scalability. For more insights, explore this guide on network server solutions.
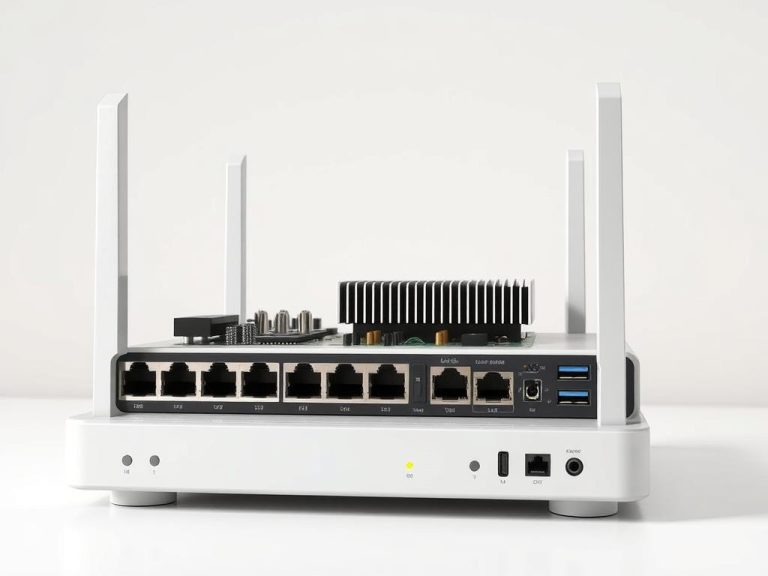
Preparing Your Computer for Server Setup
Transforming an existing system into a server requires careful planning and the right components. Proper preparation ensures smooth operation and optimal performance. Start by evaluating your hardware and software requirements to determine compatibility.

Hardware and Software Requirements
Your computer must meet specific benchmarks to function as a server. For example, Ubuntu Server 8.04 requires at least 64MB of RAM and 600MB of storage. Modern systems, however, demand more robust specifications, such as 4GB of RAM and multi-core processors.
Storage is another critical factor. Allocate sufficient drive space for your server’s intended use. RAID configurations, like RAID 1, provide data redundancy, ensuring reliability. For operating systems, consider SSD storage for faster performance.
- Ubuntu Server: 64MB RAM, 600MB storage (minimum).
- Windows Server Essentials: Supports up to 25 users.
- RAID 1: Mirrored drives for data redundancy.
Choosing Between Windows and Linux
Selecting the right operating system depends on your needs and familiarity. Windows Server Essentials is user-friendly and ideal for small businesses. It supports up to 25 users and integrates seamlessly with Microsoft products.
Linux, particularly Ubuntu Server Edition, is a cost-effective, open-source option. It offers flexibility and is highly customizable. However, it requires technical expertise for setup and maintenance. For insights into RAM limits and system compatibility, explore this guide on maximum RAM limits.
Cost is another consideration. Linux is free, while Windows requires licensing fees. Evaluate your budget and technical skills to make an informed decision.
How to Make a Computer a Server on a Network?
Setting up a server from your existing hardware can be straightforward. Whether you choose Windows or Linux, the process involves a few key steps. Below, we’ll walk you through the installation of Apache on Windows and the setup of Ubuntu Server Edition.
Installing Apache Server on Windows
To begin, download the latest version of Apache HTTP Server (e.g., 2.2.6) from the official website. Run the .msi file and follow the default settings. During the installation, specify the server name and email address. Once complete, verify the setup by accessing http://localhost in your browser.
Here’s a quick summary of the steps:
- Download the Apache .msi file.
- Run the installer and follow the prompts.
- Specify server details during setup.
- Verify the installation via your browser.
Setting Up Ubuntu Server Edition
For Ubuntu, start by burning the server ISO to a CD or USB using tools like MagicISO or DVD Decrypter. Boot your system from the media and follow the on-screen instructions. During the BIOS boot process, ensure your system prioritizes the installation media.
After installation, set up Webmin for easier management. Use the following terminal commands:
sudo apt-get install perl libnet-ssleay-perl openssl libauthen-pam-perl libpam-runtime libio-pty-perl libmd5-perl
sudo wget http://prdownloads.sourceforge.net/webadmin/webmin_1.430_all.deb
sudo dpkg -i webmin_1.430_all.deb
Access Webmin via your browser at https://your-server-IP:10000/.
| Feature | Windows (Apache) | Ubuntu (Webmin) |
|---|---|---|
| Ease of Use | User-friendly GUI | Requires CLI knowledge |
| Cost | Licensing fees apply | Free and open-source |
| Management | Integrated tools | Webmin for GUI |
Both options have their strengths. Windows offers a familiar interface, while Ubuntu provides flexibility and cost savings. Choose based on your needs and technical expertise.
Configuring Your Server for Optimal Performance
Optimizing your server setup ensures seamless performance and accessibility across your network. Proper configuration enhances reliability and efficiency, whether for personal or business use. Focus on key areas like port forwarding and domain setup to maximize functionality.

Port Forwarding and Network Settings
Port forwarding allows external devices to access your server through specific ports. Common services like HTTP (port 80), FTP (port 21), and SSH (port 22) require proper configuration. Navigate your router’s UI to set up port forwarding effectively.
Select the appropriate protocol (TCP or UDP) based on the service type. TCP is ideal for reliable data transfer, while UDP suits faster, less critical tasks. Ensure your server’s IP address is static to avoid disruptions.
- Access your router’s admin panel.
- Locate the port forwarding section.
- Enter the server’s IP address and required ports.
- Save and apply the settings.
Setting Up a Free Domain Name
A domain name simplifies access to your server. Services like No-IP.com offer free dynamic DNS solutions. Create an account, choose a domain, and map it to your server’s IP address. This setup ensures accessibility even with dynamic IPs.
For businesses, consider static IP solutions for consistent access. Organize your server room with RJ45 patch panels for efficient cable management. Proper ventilation and power supply are also crucial for optimal performance.
| Feature | Dynamic DNS | Static IP |
|---|---|---|
| Cost | Free (with limitations) | Paid |
| Accessibility | Requires periodic updates | Consistent |
| Best For | Personal use | Business applications |
By configuring these settings, you ensure your server operates efficiently and remains accessible to users. Proper planning and setup are key to achieving optimal performance.
Testing and Troubleshooting Your Server
Ensuring your server operates smoothly requires thorough testing and troubleshooting. This step is crucial to identify and resolve issues before they impact performance. Start by verifying localhost access and addressing common errors during the installation process.

Checking Localhost Access
To validate your server’s functionality, access http://localhost in your browser. A successful connection confirms the server is running correctly. If the page doesn’t load, check for errors in the software configuration or firewall settings.
Common issues include incorrect port settings or missing dependencies. Use tools like WinSCP to transfer files to /var/www and PuTTY for remote SSH access. These tools simplify troubleshooting and ensure seamless connection management.
Resolving Common Installation Errors
Apache error codes often indicate issues during setup. For example, “Error 403” suggests permission problems, while “Error 500” points to server misconfigurations. Diagnose these errors using online resources or log files.
Firewall conflicts can also disrupt server access. Ensure the necessary ports are open and configured correctly. Use the following steps to troubleshoot:
- Verify the server’s IP address and port settings.
- Check firewall rules for blocked connections.
- Review Apache or other server logs for error details.
| Tool | Purpose |
|---|---|
| WinSCP | File transfers to server directories |
| PuTTY | Remote SSH access and configuration |
| Apache Logs | Diagnose server errors and misconfigurations |
By addressing these issues promptly, you ensure your server remains reliable and accessible. Proper testing and troubleshooting are essential for maintaining optimal performance.
Securing Your Network Server
Protecting your server from vulnerabilities is essential for maintaining a secure and reliable system. Without proper safeguards, unauthorized access or data breaches can compromise sensitive information. Implementing robust security measures ensures your server remains resilient against threats.

Implementing Basic Security Measures
Start by installing reliable antivirus software. For Linux-based systems, Avast Linux Server Antivirus offers comprehensive protection. Windows users should adhere to Microsoft’s update policies to ensure timely security patches. Regularly updating your system minimizes exposure to known vulnerabilities.
Server hardening techniques are another critical step. Limit unnecessary services, configure firewalls, and enforce strong authentication methods. Assign user permissions hierarchically to control access levels. Use commands like sudo chown and sudo chmod to manage folder ownership and permissions effectively.
- Install Avast Linux Server Antivirus for Linux systems.
- Enable Windows Server update policies for automatic patching.
- Configure firewalls and limit unnecessary services.
- Implement user permission hierarchies.
Regular Maintenance and Updates
Schedule regular updates for both the operating system and installed software. Automated backups to external drives ensure data integrity and quick recovery in case of failure. Hot-swappable drive maintenance simplifies hardware replacements without downtime.
Power surge protection is equally important. Uninterruptible Power Supply (UPS) systems safeguard your server during outages or fluctuations. Proper ventilation and cable management also contribute to optimal performance and longevity.
“Regular maintenance is the backbone of a secure and efficient server setup.”
- Automate backups with external drives for disaster recovery.
- Use UPS systems for power surge protection.
- Maintain proper ventilation and cable organization.
Conclusion
Transforming an existing system into a reliable server is a practical way to maximize resources. By carefully selecting the right operating system and preparing your hardware, you can create a robust setup tailored to your needs. Security measures, such as firewalls and regular updates, ensure your server remains protected over time.
Repurposing older hardware not only saves costs but also extends the life of your computer. Tools like Nagios or Zabbix help monitor performance, ensuring smooth operation. For those ready to explore further, advanced configurations like RAID setups or redundant power supplies offer enhanced reliability.
Before deployment, follow a final checklist: verify compatibility, install necessary software, and test thoroughly. This ensures your server is ready for production use. With proper planning, your network setup can be both efficient and cost-effective.
FAQ
What hardware is needed to turn a computer into a server?
A reliable processor, sufficient RAM (8GB minimum), and ample storage are essential. A stable internet connection with a static IP or dynamic DNS is also recommended.
Can Windows 10 or 11 be used as a server?
Yes, Windows 10/11 can function as a server using software like Apache or IIS. However, Windows Server OS is better optimized for hosting.
How do I assign a static IP to my server?
Navigate to Network Settings > TCP/IPv4 Properties on Windows or edit /etc/netplan/ on Linux. Enter the desired IP, subnet mask, and gateway.
Is port forwarding necessary for a home server?
Yes, if external access is required. Forward ports (e.g., 80 for HTTP) in your router settings to direct traffic to the server’s local IP.
What’s the easiest way to test server functionality?
Access http://localhost or the server’s local IP in a browser. For external testing, use a service like CanYouSeeMe.org to check open ports.
How do I secure my DIY server from attacks?
Enable firewalls, disable unused services, use SSH keys instead of passwords, and keep software updated. Tools like Fail2Ban help block brute-force attempts.
Can I host a website on a home server?
Absolutely. Install a web server (Apache/Nginx), register a domain, and link it via DNS. Note that residential ISPs may block port 80.
What’s the difference between Ubuntu Server and Desktop for hosting?
Ubuntu Server lacks a GUI, reducing resource usage. It includes pre-installed tools like LAMP stack, ideal for dedicated hosting environments.