Easy Steps to Reconnect Your Printer Hardware to Your Computer
Printers often disconnect unexpectedly, causing frustration in homes and offices. Common issues include loose cables, outdated drivers, or network glitches. A systematic approach helps resolve these problems efficiently.
Modern systems like Windows 10/11 sometimes struggle with older devices. Checking compatibility ensures smooth operation. Both wired and wireless methods offer reliable solutions for different setups.
Safety comes first when handling components. Always power off the equipment before making adjustments. Driver management tools and manufacturer software simplify troubleshooting.
Whether using USB or Wi-Fi connections, following proper steps prevents errors. HP Instant Ink users should verify service compatibility during setup. These precautions save time and reduce technical headaches.
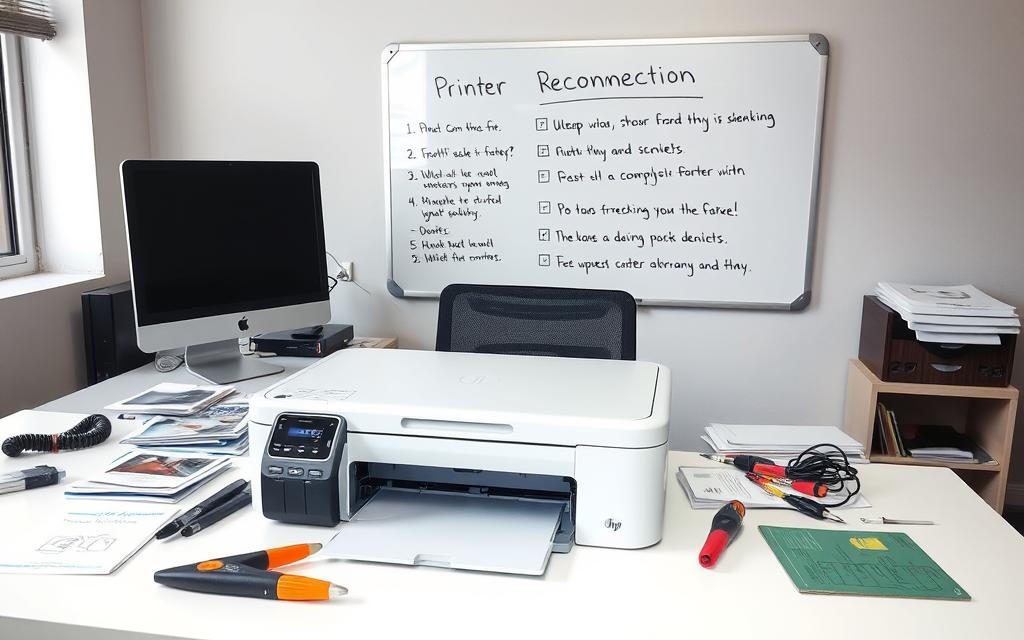
How to Reconnect Printer Hardware Device to the Computer?
A disrupted printing process often starts with checking the basics. Proper connections and power status are critical for seamless operation. Begin by inspecting the physical setup before diving into software solutions.
Check Physical Connections First
Start by examining all cables and ports. Ensure USB, Ethernet, or parallel connections are secure and undamaged. Bent pins or frayed wires can cause recognition issues.
Related Posts:


Test alternative USB ports to rule out faulty hardware. If the problem persists, try using a different cable. For wireless setups, verify the router’s proximity and ensure the correct network band (2.4GHz vs 5GHz) is selected.
- Inspect USB, Ethernet, and power cables for damage.
- Test different ports and cables to isolate the issue.
- Ensure wireless devices are within range of the router.
Verify Power and Network Status
Check the LED indicators on your equipment. A steady light usually signifies proper power and network connectivity. If the lights are off or blinking, troubleshoot accordingly.
Test alternative power outlets or surge protectors to ensure stable electricity. For network issues, verify connectivity using another device like a laptop or phone. Refresh the Device Manager to check for USB recognition problems.
- Interpret LED indicators for power and network status.
- Test power outlets and network cables for functionality.
- Use the USB cable provided with the Elegoo for compatibility.
Setting Up Your Printer on Windows
Windows offers intuitive tools to simplify the setup process for your devices. Whether you’re using Windows 10 or 11, the built-in features ensure a smooth experience. Both automatic detection and manual installation methods are available to suit your needs.
Automatic Detection in Windows 10/11
Windows 10 and 11 can automatically detect most devices. Navigate to Settings > Devices > Printers & Scanners (Windows 10) or Settings > Bluetooth & devices > Printers & scanners (Windows 11). Click the Add a printer or scanner button to start the process.
If the system doesn’t find your device, ensure it’s powered on and connected properly. Restarting both the device and your computer can often resolve detection issues. For more tips, visit this guide.
Manual Printer Installation Steps
For devices not detected automatically, manual installation is an option. Download the latest drivers from the manufacturer’s website. Follow the on-screen instructions to complete the setup.
For network devices, manually enter the IP address during installation. This ensures the system recognizes the device correctly. Legacy ports like LPT or COM may require additional configuration for industrial equipment.
Enterprise users should check group policy restrictions to avoid compatibility issues. Microsoft Store’s driver repository can also be accessed through Windows Update for additional support.
Reinstalling Printer Drivers for a Fresh Start
Outdated or corrupted drivers can disrupt printing tasks, making reinstallation essential. A clean setup ensures your device operates smoothly and efficiently. Follow these steps to resolve driver-related issues effectively.
Begin by removing existing drivers through the Device Manager. Navigate to Printers, right-click your device, and select Uninstall device. This step clears any problematic configurations.

Next, download the latest drivers from the manufacturer’s website. Verify compatibility with your operating system and model. Always check for a digital signature to ensure authenticity.
If a recent update causes issues, use the Driver Rollback feature. Access the Driver tab in Device Manager and select Roll Back Driver. This reverts to a stable version.
| Step | Action | Purpose |
|---|---|---|
| 1 | Uninstall via Device Manager | Remove corrupted drivers |
| 2 | Download from manufacturer site | Ensure compatibility and authenticity |
| 3 | Roll back drivers if needed | Restore stable functionality |
For persistent issues, reset the Print Spooler service. Open Command Prompt and run net stop spooler followed by net start spooler. This refreshes communication between the device and software.
HP users can utilize the Universal Print Driver for multiple models. However, verify its limitations for specific features. Clean boot troubleshooting resolves conflicts caused by third-party software.
Reinstalling drivers ensures your device operates seamlessly. Regular updates and proper management prevent future disruptions. Follow these steps for a hassle-free experience.
Connecting Your Printer to a Wireless Network
Wireless printing offers convenience but requires proper setup for seamless operation. Ensuring compatibility and configuring the right settings are crucial for success. Whether you’re using a home or office network, these steps will guide you through the process.
Ensuring Wi-Fi Compatibility
Before connecting, verify that your printer supports your network’s Wi-Fi protocol. Most modern devices are compatible with 802.11 a/b/g/n/ac/ax standards. Check the manufacturer’s documentation for specific details.
For enhanced security, configure WPA3 encryption on your router. This ensures your wireless connection remains protected. If your network uses a hidden SSID, follow the printer’s manual for special connection procedures.
Using the Printer’s Onboard Web Portal
Accessing the web portal simplifies configuration. Locate the printer’s IP address using the LCD menu or a printed network configuration page. Enter the IP address into a web browser to open the portal.
Default credentials like admin/admin are often used for initial login. Once inside, update the firmware to ensure optimal performance. Test signal strength using the diagnostic tools available in the portal.
| Step | Action | Purpose |
|---|---|---|
| 1 | Verify Wi-Fi protocol | Ensure compatibility |
| 2 | Configure WPA3 security | Protect the connection |
| 3 | Access the web portal | Update settings and firmware |
For mesh networks, ensure the printer is within range of the primary router. This guarantees stable connectivity across your entire home or office. Proper setup ensures your printer operates efficiently on the wireless network.
Troubleshooting Common Printer Connection Issues
Connection issues can disrupt workflow, but Windows provides tools to identify and resolve them efficiently. Whether it’s a hardware conflict or a software glitch, understanding the root cause is essential. Below, we explore practical methods to diagnose and fix these problems.

Running the Windows Hardware Troubleshooter
The Windows Hardware Troubleshooter is a built-in tool designed to detect and fix common problems. Access it through Settings > Devices > Printers & scanners in Windows 10 or Settings > Bluetooth & devices > Printers & scanners in Windows 11. Select your device and click Manage to run the troubleshooter.
This tool can identify issues like driver conflicts or incorrect default settings. If the troubleshooter suggests a fix, follow the on-screen instructions. For persistent issues, consider using manufacturer-specific tools like HP’s Print and Scan Doctor.
- Access the troubleshooter via Windows settings.
- Follow suggested fixes for detected problems.
- Use diagnostic tools for advanced troubleshooting.
Checking for Error Codes in Device Manager
Error codes in the Device Manager provide insights into specific issues. Common codes include Code 45 (device disconnected), Code 28 (driver missing), and Code 31 (driver conflict). To resolve these, start by physically reconnecting the device and reinstalling drivers.
For Code 45, ensure all cables are secure and test alternative ports. If the issue persists, download the latest drivers from the manufacturer’s website. Use the Event Viewer to analyze print spooler errors and configure USB root hub power management settings.
| Error Code | Description | Solution |
|---|---|---|
| Code 45 | Device disconnected | Reconnect and reinstall drivers |
| Code 28 | Driver missing | Download and install drivers |
| Code 31 | Driver conflict | Roll back or update drivers |
For advanced troubleshooting, boot into Safe Mode to identify driver conflicts. This prevents third-party software from interfering with the diagnostic process. Regularly updating drivers and firmware ensures long-term stability.
Advanced Solutions for Persistent Problems
When standard troubleshooting fails, advanced tools like SFC, DISM, and CHKDSK can resolve persistent system issues. These tools are designed to fix corrupted files, repair disk errors, and restore overall stability. Whether you’re dealing with a slow-performing hardware setup or unrecognized devices, these methods provide reliable solutions.
Using System File Checker (SFC)
The System File Checker (SFC) is a built-in Windows tool that scans and repairs corrupted files. To run it, open Command Prompt as Administrator and type sfc /scannow. This scan can take several minutes, depending on your system’s size and condition.
After completion, the tool provides a summary of its findings. Common messages include “Windows Resource Protection found corrupt files and successfully repaired them” or “No integrity violations detected.” For unresolved issues, proceed to the next step.
Running DISM and CHKDSK Scans
If SFC doesn’t resolve the problem, use the Deployment Image Servicing and Management (DISM) tool. Enter DISM /Online /Cleanup-Image /RestoreHealth in Command Prompt. This scan repairs the Windows image and can take up to 30 minutes.
For disk-related issues, the Check Disk (CHKDSK) tool is essential. Run chkdsk /f /r to identify and repair bad sectors. This process may require a system restart, so save all work before proceeding.

| Tool | Command | Purpose |
|---|---|---|
| SFC | sfc /scannow | Repair corrupted system files |
| DISM | DISM /Online /Cleanup-Image /RestoreHealth | Fix Windows system image |
| CHKDSK | chkdsk /f /r | Check and repair disk errors |
For advanced troubleshooting, create a system restore point before running these tools. This ensures you can revert to a stable state if needed. For issues like Code 45 in Device Manager, these tools often provide effective resolutions.
Regularly updating drivers and maintaining your hardware setup prevents future disruptions. By leveraging these advanced tools, you can ensure your system operates smoothly and efficiently.
Sharing Your Printer Across a Network
Sharing a printer across a network enhances productivity and simplifies workflows in both home and office environments. Whether you’re in a workgroup or domain setup, proper configuration ensures seamless access for all users.

To enable sharing, navigate to Printer Properties and select the Sharing tab. Check the box labeled Share this printer to make it available on the network. Ensure File and Printer Sharing is enabled in the Network and Sharing Center for Windows users.
Configuring permissions is crucial for security. Choose between user-level or everyone access based on your needs. User-level permissions restrict usage to authorized individuals, while everyone access allows broader use.
- Workgroup setups are ideal for small offices, while domains suit larger enterprises.
- Enable firewall exceptions for File and Printer Sharing to avoid connectivity issues.
- Consider MAC address filtering on routers for added security.
Cross-platform printing is achievable with the right settings. Windows users can share with macOS or Linux systems by ensuring both devices are on the same network. For cloud integration, explore alternatives to Google Cloud Print for modern solutions.
Enterprise environments benefit from audit logging to track usage and ensure compliance. Regularly review settings to maintain optimal performance and security across your network.
Conclusion
Resolving printing issues requires a systematic approach to ensure efficiency. Start by checking physical connections, ensuring cables and ports are secure. Next, verify that drivers are up-to-date and compatible with your system. For wireless setups, confirm network connectivity and router settings.
If problems persist, escalate the issue by contacting the manufacturer’s support team. Provide case numbers and logs for faster resolution. Regular preventive maintenance, like cleaning and updating firmware, prevents future disruptions.
For shared environments, prioritize security by enabling encryption and updating firmware. These steps ensure your printer operates smoothly, minimizing downtime and enhancing productivity.
FAQ
Why won’t my computer detect the printer after reconnecting?
Ensure cables are secure, power is on, and the correct drivers are installed. Restart both devices and check Device Manager for hardware conflicts.
How do I manually add a printer in Windows 10/11?
Go to Settings > Devices > Printers & scanners, click Add a printer, and follow prompts. Select your model or download drivers from the manufacturer’s website.
What should I do if my wireless printer won’t connect?
Verify Wi-Fi credentials, restart the router, and ensure the printer is within range. Use the printer’s web portal or LCD menu to re-enter network details.
How can I update outdated printer drivers?
Open Device Manager, expand Print queues, right-click your printer, and select Update driver. Alternatively, download the latest version from the manufacturer’s support page.
Why does my printer show as “offline” even when connected?
Check the printer’s status in Control Panel > Devices and Printers. Right-click the device, choose See what’s printing, and select Use printer online.
Can I share a printer with other computers on my network?
Yes. Enable printer sharing in Control Panel > Devices and Printers, then right-click the printer, select Printer properties, and navigate to the Sharing tab.
What if Windows Troubleshooter doesn’t fix my connection issue?
Run advanced tools like System File Checker (SFC) or DISM to repair system files. For hardware errors, consult the printer’s manual or contact support.